Doyon JAOP6 Bedienungsanleitung
Stöbern Sie online oder laden Sie Bedienungsanleitung nach Ofen Doyon JAOP6 herunter. Doyon JAOP6 Manuel d'utilisation Benutzerhandbuch
- Seite / 60
- Inhaltsverzeichnis
- LESEZEICHEN
Bewertet. / 5. Basierend auf Kundenbewertungen
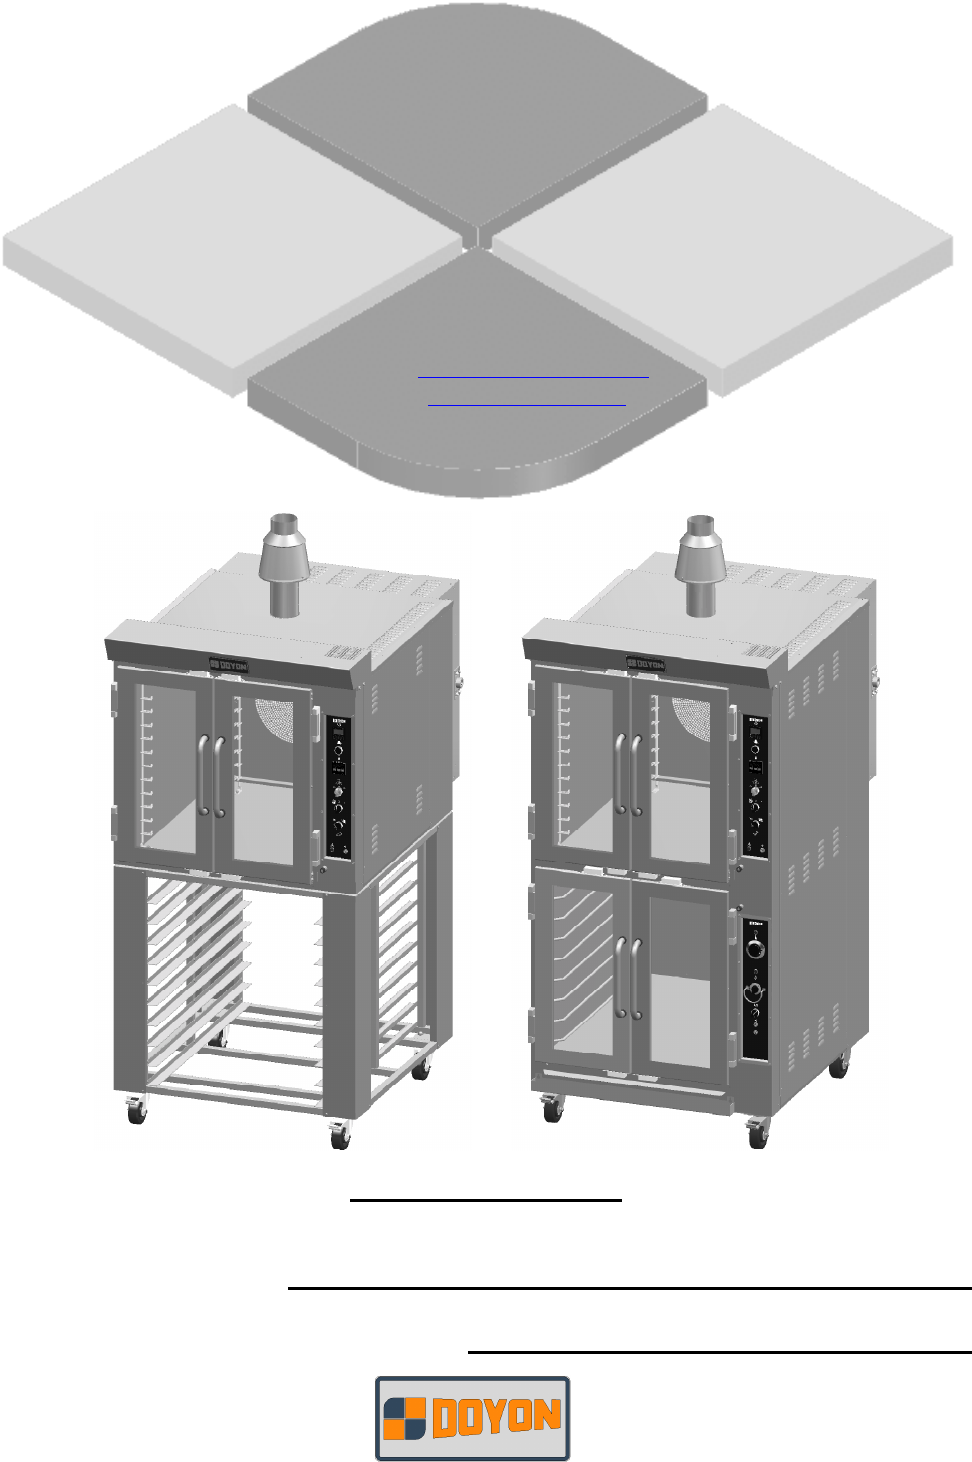
JA6G - JAOP6G
Product / Produit:
Serial number / Numéro de série:
ÉQUIPEMENT DOYON INC.
1255, rue Principale
Linière, Qc, Canada G0M 1J0
Tel.: 1 (418) 685-3431
Canada: 1 (800) 463-1636
US: 1 (800) 463-4273
FAX: 1 (418) 685-3948
Internet: http://www.doyon.qc.ca
e-mail: [email protected]
- JA6G - JAOP6G 1
- TABLE OF CONTENTS 2
- TABLE DES MATIÈRES 3
- INTRODUCTION 4
- CONSTRUCTION 4
- SHIPPING 4
- EXPÉDITION 5
- INSTALLATION WARNINGS 6
- DISTANCES TO RESPECT 7
- DISTANCES À RESPECTER 9
- INSTALLATION 10
- OPERATION OF THE OVEN 14
- OPÉRATION DU FOUR 15
- INSTRUCTIONS FOR OVEN 16
- INSTRUCTIONS POUR FOUR 17
- OPERATION OF THE PROOFER 18
- POWER FAILURE 18
- PANNE DE COURANT 19
- OPÉRATION DE L'ÉTUVE 19
- MANUAL MODE 22
- PROGRAM MODE 23
- MODE MANUEL 29
- MODE PROGRAMMABLE 30
- TROUBLESHOOTING 36
- Questions Solutions 36
- DÉPANNAGE 38
- Problèmes Solutions 38
- AVERTISSEMENT 39
- Étape par étape Solutions 41
- BAKE CHART 42
- TABLEAU DE CUISSON 43
- COMPONENT PARTS 44
- PIÈCES COMPOSANTE 44
- JAOP6G – FRONT VIEW 44
- JAOP6G – VUE DE FACE 44
- JAOP6G – RIGHT SIDE VIEW 46
- JAOP6G – VUE DE CÔTÉ DROIT 46
- JAOP6G – BACK VIEW 48
- JAOP6G – VUE ARRIÈRE 48
- CONTROL PANELS 50
- PANNEAUX DE CONTRÔLE 50
- 1PH 120V WITH ZELIO 50
- 1PH 120V AVEC ZELIO 50
- 1PH 120V WITHOUT ZELIO 51
- 1PH 120V SANS ZELIO 51
- BURNER ADJUSTEMENTS 54
- AJUSTEMENT DU BRÛLEUR 54
- NATURAL GAS 54
- GAZ NATUREL 54
- PROPANE GAS 55
- GAZ PROPANE 55
- LIMITED WARRANTY 59
- GARANTIE LIMITÉE 60
Inhaltsverzeichnis
Seite 1 - JA6G - JAOP6G
JA6G - JAOP6GProduct / Produit: Serial number / Numéro de séri
Seite 2 - TABLE OF CONTENTS
A-7INSTALLATIONIN GENERALTake off the packaging material with care. Take off all the material used for packing and accessories.Install the draft hood
Seite 3 - TABLE DES MATIÈRES
A-8The customer must install a manual shut off valve at the end of the gas supply pipe near the burnerwhich is approved by the American Gas Associatio
Seite 4 - SHIPPING
A-9INSTALLATIONEN GÉNÉRALOuvrir avec soin l'emballage de votre équipement. Enlever tous les matériaux utilisés pourl'envelopper ainsi que le
Seite 5 - EXPÉDITION
A-10Le client doit installer une vanne manuelle à la sortie de l'alimentation au gaz près du brûleur,laquelle doit être approuvée par l'Asso
Seite 6 - INSTALLATION WARNINGS
A-11OPERATION OF THE OVEN1. Turn the switch to the "1" position.• The light inside the oven must light up.2. Adjust the thermostat at the de
Seite 7 - DISTANCES TO RESPECT
A-12OPÉRATION DU FOUR1. Démarrer le four (tourner le sélecteur à la position ‘’1’’).•La lumière à l'intérieur du four doit allumer.2. Ajuster le
Seite 8
A-13INSTRUCTIONS FOR OVENOPENING AND CLOSING THE DOORSTo open the doors: Open one of the doors up to 2" and wait 2 seconds to let the fan reduce
Seite 9 - DISTANCES À RESPECTER
A-14INSTRUCTIONS POUR FOUROUVERTURE ET FERMETURE DES PORTESPour ouvrir les portes: Ouvrir une des portes de 2 pouces et attendre 2 secondes afin de pe
Seite 10 - INSTALLATION
A-15OPERATION OF THE PROOFER1. Switch "ON" (1).2. Set the thermostat control at 100° F.3. Set the humidity control at approximately:3 for
Seite 11
A-16OPÉRATION DE L'ÉTUVE1. Placer l'interrupteur à "ON" (1).2. Placer le bouton du thermostat à 100°F.3. Placer le bouton d'
Seite 12
FAM6G [LIVRET].doc 04/10IMPORTANT SAFETY INSTRUCTIONSSAVE THESE INSTRUCTIONSDANGERTO REDUCE THE RISK OF FIRE OR ELECTRIC SHOCKCAREFULLY FOLLOW THESE I
Seite 13
A-17ECM-1 PROGRAMMABLE CONTROL - OPERATING MODESThe Doyon ECM-1 controller has two operation modes Manual and Programmable.MANUAL: to use all function
Seite 14 - OPERATION OF THE OVEN
A-18How to select a cook program or the Manual ModeTo select a recipe program, enter the recipe number with the numeric keypad and press (Start) oru
Seite 15 - OPÉRATION DU FOUR
A-19MANUAL MODEThis mode is used to work one step program.Press on (Start) when the oven is ON, the oven will run on preheat mode at the manual mode
Seite 16 - INSTRUCTIONS FOR OVEN
A-20PROGRAM MODEThis mode is used to program a Cook Recipe.Cook Program structureA cook program consists of a name as well as a number of steps. The n
Seite 17 - INSTRUCTIONS POUR FOUR
A-21Steam□ 1st parameter can be: OFF, ON, PULSE.○ If OFF, steam remains off for duration of step.○ If ON, steam remains on for duration of step.○ If P
Seite 18 - POWER FAILURE
A-22When a Cook Program is used, if the timer is inactive, the oven is considered idle(but it still maintains the set point). In Manual Mode, the time
Seite 19 - OPÉRATION DE L'ÉTUVE
A-23Cavity Probe Alarm□ Occurs when units detects a defective cavity or food temperature probe.□ Unit goes into Off mode with error message CAVITY PRO
Seite 20
A-24CONTRÔLE PROGRAMMABLE ECM-1 - MODES D'OPÉRATIONLe contrôleur ECM-1 Doyon est doté du mode de fonctionnement manuel et programmable.MANUEL : p
Seite 21
A-25Comment sélectionner une recette programmée ou le Mode ManuelPour choisir une recette programmée, entrez le numéro de la recette à l'aide du
Seite 22 - MANUAL MODE
A-26MODE MANUELCe mode est employé pour l’utilisation des fonctions sans avoir de recettes à programmer.FONCTION TEMPÉRATUREPour changer le degré de t
Seite 23 - PROGRAM MODE
IMPORTANT INSTRUCTIONS DE SÉCURITÉCONSERVEZ CE MANUEL D’INSTRUCTIONSDANGERAFIN DE RÉDUIRE LES RISQUES D'INCENDIE OU D'ÉLECTROCUTIONSUIVRE CE
Seite 24
A-27MODE PROGRAMMABLECe mode est utilisé pour programmer une recette de cuisson.Structure d'un Programme de CuissonUn Programme de Cuisson consis
Seite 25
A-28Vapeur□ Pour le 1er paramètre, les choix sont : MARCHE, ARRET, PULSE.○ ARRET : la vapeur reste fermée pour toute la durée de l'étape.○ MARC
Seite 26
A-29Fonction par défaut lors de l'utilisation d'un Programme de Cuisson (ou ModeManuel). Si la minuterie n'est pas active, le four est
Seite 27
A-30Alarme de sonde de cavité□ Survient lorsque l'unité détecte une défectuosité en ce qui concerne la sonde de cavité ou lasonde de nourriture.□
Seite 28
A-31ECM-2 PROGRAMMABLE CONTROL - OPERATING MODES1. Turn the main switch "ON" (1).2. The light inside the proofer will turn ON and the digi
Seite 29 - MODE MANUEL
A-32CONTRÔLE PROGRAMMABLE ECM-2 - MODES D'OPÉRATION1. Placer l'interrupteur à "ON" (1).2. La lumière à l’intérieur de l’étuve s’a
Seite 30 - MODE PROGRAMMABLE
A-33TROUBLESHOOTINGBEFORE CALLING FOR SERVICEANSWERS TO MOST FREQUENT QUESTIONSAlways cut off the main power before replacing any parts. Take care of
Seite 31
A-34Uneven baking.Make sure that the grills do not obstruct the air flow. Do not usefoil on the grills.Verify the temperature of the oven by using an
Seite 32
A-35DÉPANNAGEAVANT D'APPELER LE DÉPARTEMENT DE SERVICESOLUTION AUX PROBLÈMES LES PLUS FRÉQUENTSToujours fermer l'approvisionnement du couran
Seite 33
A-36Cuisson inégale. Assurez-vous que les grilles permettent à l'air de circuler librement.Ne recouvrez pas les grilles de papier d'alumini
Seite 34
A-1SECTION A: DESCRIPTIONINTRODUCTIONThe manufacturer suggests to read this manual carefully.This Jet Air oven is manufactured with first quality mate
Seite 35
A-37OVEN MAINTENANCE AND CLEANINGMAINTENANCE OF THE BURNER• Once a year, you should ask a certified technician to make a tune up.Make sure everything
Seite 36 - Questions Solutions
A-38ENTRETIEN ET NETTOYAGE DU FOURENTRETIEN DU BRÛLEUR•Vous devriez faire faire l'entretien de votre système de brûleur par un technicien qualifi
Seite 37
A-39BAKE CHARTBAKERY OVENS (Table as reference only)Menu itemBake TimeMinutesBake TempºFBake TempºCBagels (16 per pan) 15 400 204Dinner rolls (16 per
Seite 38 - Problèmes Solutions
A-40TABLEAU DE CUISSONFOURS À PAIN ET PÂTISSERIE (Tableau à titre de référence seulement)ItemTempscuisson min.Temp.cuisson ºFTemp.cuisson ºCBagels (16
Seite 39 - AVERTISSEMENT
B-1SECTION B: COMPONENT PARTSPIÈCES COMPOSANTEJAOP6G – FRONT VIEWJAOP6G – VUE DE FACEB-1
Seite 40
B-2ItemItemPart NumberNuméro PièceDescription DescriptionQuantityQuantité1 ELM617BLACK COVER FORELM616COUVERCLE NOIR POURELM61612 ELM616 ELECTRONIC TI
Seite 41 - Étape par étape Solutions
B-3JAOP6G – RIGHT SIDE VIEWJAOP6G – VUE DE CÔTÉ DROITB-3
Seite 42 - BAKE CHART
B-4Item Part Number Description Quantity1 ELM760 COOLING FAN 120V 12 ELT503 HIGH LIMIT SWITCH 140°F 13 ELS950 BUZZER 120V 24 ELD050 INCANDESCENT LIGH
Seite 43 - TABLEAU DE CUISSON
B-5JAOP6G – BACK VIEWJAOP6G – VUE ARRIÈREB-5
Seite 44 - JAOP6G – VUE DE FACE
B-6Item Part Number Description Quantity1 PLCU160 MAIN WATER INLET CONNECTOR 12 PLF100 WATER FILTER 13 GAC230 HONEYWELL CARBURATOR (NATURAL, EXCEPTTLO
Seite 45
A-2DESCRIPTIONINTRODUCTIONLe fabricant suggère de lire attentivement ce manuel et de suivre avec soin les instructions fournies.Votre four à convectio
Seite 46 - JAOP6G – VUE DE CÔTÉ DROIT
C-1SECTION C: CONTROL PANELSPANNEAUX DE CONTRÔLE1PH 120V WITH ZELIO1PH 120V AVEC ZELIOC-1
Seite 47
C-21PH 120V WITHOUT ZELIO1PH 120V SANS ZELIOC-2
Seite 48 - JAOP6G – VUE ARRIÈRE
C-3120/208-240V 1PH WITH ZELIO SIMPLE120/208-240V 1PH AVEC ZELIO SIMPLEC-3
Seite 49
C-4120/208-240V 1PH WITHOUT ZELIO SIMPLE120/208-240V 1PH SANS ZELIO SIMPLEC-4
Seite 50 - 1PH 120V AVEC ZELIO
SECTION D: BURNER ADJUSTEMENTSAJUSTEMENT DU BRÛLEURNATURAL GASGAZ NATURELD-1
Seite 51 - 1PH 120V SANS ZELIO
PROPANE GASGAZ PROPANED-2
Seite 54 - GAZ NATUREL
NOTES
Seite 55 - GAZ PROPANE
LIMITED WARRANTY(Continental United States Of America And Canada Only)Doyon Equipment Inc. guarantees to the original purchaser only that its product
Seite 56
A-3INSTALLATION WARNINGSThe DOYON gas fired ovens are designed to be used with the gas specified on the descriptivenameplate. Refer to National Fuel
Seite 57
GARANTIE LIMITÉE(Pour le Canada et les États continentaux des États-Unis)Équipement Doyon Inc. garantit ses produits à l'acheteur original, contr
Seite 58
A-4DISTANCES TO RESPECTA) Back and sides of the oven: 1 inch.B) Top of the oven: a clearance of 12 inches to the ceiling must exist to permit adequate
Seite 59 - LIMITED WARRANTY
A-5AVERTISSEMENT LORS DE L'INSTALLATIONLes unités au gaz "DOYON" sont fabriquées pour être utilisées uniquement avec le type de gazspéc
Seite 60 - GARANTIE LIMITÉE
A-6DISTANCES À RESPECTERA) Arrière et côtés du four : 1 pouce.B) Dessus du four : Il est obligatoire d'avoir au moins 12 pouces entre le dessus d
Weitere Dokumente für Ofen Doyon JAOP6

Doyon JAOP6 Bedienungsanleitung
(48 Seiten)
Verwandte Produkte und Handbücher für Ofen Doyon JAOP6
Ofen Doyon JA8 Bedienungsanleitung

 (52 Seiten)
(52 Seiten)
Ofen Doyon JA8 Bedienungsanleitung
(60 Seiten)
(60 Seiten)
Ofen Doyon JAOP14 Bedienungsanleitung
(52 Seiten)
(52 Seiten)
Ofen Doyon JAOP12SL Bedienungsanleitung
(56 Seiten)
(56 Seiten)
Ofen Doyon JAOP14 Bedienungsanleitung
(56 Seiten)
(56 Seiten)
Ofen Doyon JAOP10 Bedienungsanleitung
(52 Seiten)
(52 Seiten)
Ofen Doyon JAOP10 Bedienungsanleitung
(60 Seiten)
(60 Seiten)
Ofen Doyon SRO2 Bedienungsanleitung
(35 Seiten)
(35 Seiten)
Ofen Doyon CAOP12 Bedienungsanleitung
(60 Seiten)
(60 Seiten)
Ofen Doyon JAOP3 Bedienungsanleitung
(67 Seiten)
(67 Seiten)
Ofen Doyon PIZ3 Bedienungsanleitung
(52 Seiten)
(52 Seiten)
Ofen Doyon PIZ3 Bedienungsanleitung
(44 Seiten)
(44 Seiten)
Ofen Doyon FPR3 Bedienungsanleitung
(56 Seiten)
(56 Seiten)
© 2020, manymanuals.de. Alle Rechte vorbehalten. | 0.610 s |
 Manymanuals.com
 Manymanuals.de
 Manymanuals.fr
 Manymanuals.it
 Manymanuals.pl
 Manymanuals.cz
 Manymanuals.es
 Manymanuals-pt.com
Kommentare zu diesen Handbüchern